- Shop
- Lumber
- Shop All
-
-
-
Lumber
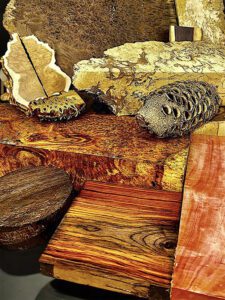
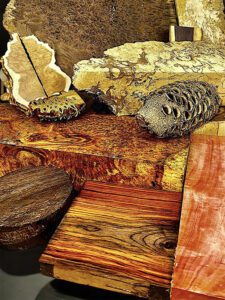
Our Exotic Lumber range includes long, short, and micro cuts, as well as striking table slabs – all selected for their premium quality and character. Whether you need structural stock, feature pieces, or finely sized boards for detailed work, we supply a wide variety of tropical and temperate hardwoods to suit joinery, cabinetry, and bespoke projects.
-
-
- Long Lumber
-
-
-
Long Lumber
Our Exotic Lumber range includes long, short, and micro cuts, as well as striking table slabs – all selected for their premium quality and character. Whether you need structural stock, feature pieces, or finely sized boards for detailed work, we supply a wide variety of tropical and temperate hardwoods to suit joinery, cabinetry, and bespoke projects.
-
-
- Short Lumber
-
-
-
Short Lumber
Our Exotic Lumber range includes long, short, and micro cuts, as well as striking table slabs – all selected for their premium quality and character. Whether you need structural stock, feature pieces, or finely sized boards for detailed work, we supply a wide variety of tropical and temperate hardwoods to suit joinery, cabinetry, and bespoke projects.
-
-
- Micro Lumber
-
-
-
Micro Lumber
Our Exotic Lumber range includes long, short, and micro cuts, as well as striking table slabs – all selected for their premium quality and character. Whether you need structural stock, feature pieces, or finely sized boards for detailed work, we supply a wide variety of tropical and temperate hardwoods to suit joinery, cabinetry, and bespoke projects.
-
-
- Table Slabs
-
-
-
Table Slabs
Our Exotic Lumber range includes long, short, and micro cuts, as well as striking table slabs – all selected for their premium quality and character. Whether you need structural stock, feature pieces, or finely sized boards for detailed work, we supply a wide variety of tropical and temperate hardwoods to suit joinery, cabinetry, and bespoke projects.
-
-
- Shop All
- Woodturning
- Shop All
-
-
-
Woodturning
From Pen Blanks to Bowl Blanks and natural Burrs, our Woodturning selection is ideal for turners of all levels. With vibrant colour and grain across species, each blank is chosen for performance on the lathe and visual impact in the finished piece, whether you’re crafting gifts or gallery-grade work.
-
-
- Woodturning Blanks
- Pen Blanks
-
-
-
Pen Blanks
From Pen Blanks to Bowl Blanks and natural Burrs, our Woodturning selection is ideal for turners of all levels. With vibrant colour and grain across species, each blank is chosen for performance on the lathe and visual impact in the finished piece, whether you’re crafting gifts or gallery-grade work.
-
-
- Burrs
-
-
-
Burrs
From Pen Blanks to Bowl Blanks and natural Burrs, our Woodturning selection is ideal for turners of all levels. With vibrant figure, colour, and grain across species, each blank is chosen for performance on the lathe and visual impact in the finished piece – whether you’re crafting gifts or gallery-grade work.
-
-
- Shop All
- Instrument Woods
- Shop All
-
-
-
Instrument Woods
Our Instrument Wood range features a variety of exotic hardwoods selected for their stability, workability, and visual appeal. Whether you’re building guitars, crafting necks, shaping fingerboards, or sourcing unique tops and body blanks, we supply high-quality woods suited to both acoustic and electric instrument making.
-
-
- Acoustic Guitars
-
-
-
Acoustic Guitars
Our Instrument Wood range features a variety of exotic hardwoods selected for their stability, workability, and visual appeal. Whether you’re building guitars, crafting necks, shaping fingerboards, or sourcing unique tops and body blanks, we supply high-quality woods suited to both acoustic and electric instrument making.
-
- Electric guitars
-
-
-
Electric guitars
Our Instrument Wood range features a variety of exotic hardwoods selected for their stability, workability, and visual appeal. Whether you’re building guitars, crafting necks, shaping fingerboards, or sourcing unique tops and body blanks, we supply high-quality woods suited to both acoustic and electric instrument making.
-
- Bass Guitars
-
-
-
Bass Guitars
Our Instrument Wood range features a variety of exotic hardwoods selected for their stability, workability, and visual appeal. Whether you’re building guitars, crafting necks, shaping fingerboards, or sourcing unique tops and body blanks, we supply high-quality woods suited to both acoustic and electric instrument making.
-
- Guitar Neck Blanks
-
-
-
Guitar Neck Blanks
Our Instrument Wood range features a variety of exotic hardwoods selected for their stability, workability, and visual appeal. Whether you’re building guitars, crafting necks, shaping fingerboards, or sourcing unique tops and body blanks, we supply high-quality woods suited to both acoustic and electric instrument making.
-
-
- Fingerboards
-
-
-
Fingerboards
Our Instrument Wood range features a variety of exotic hardwoods selected for their stability, workability, and visual appeal. Whether you’re building guitars, crafting necks, shaping fingerboards, or sourcing unique tops and body blanks, we supply high-quality woods suited to both acoustic and electric instrument making.
-
- Woodwind
-
-
-
Woodwind
Our Instrument Wood range features a variety of exotic hardwoods selected for their stability, workability, and visual appeal. Whether you’re building guitars, crafting necks, shaping fingerboards, or sourcing unique tops and body blanks, we supply high-quality woods suited to both acoustic and electric instrument making.
-
-
- Shop All
- Longbows
- Shop All
-
-
-
Longbows
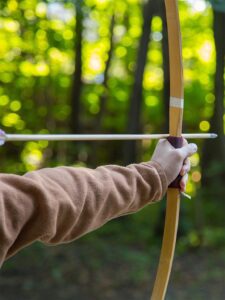
Our Longbow Wood range includes a variety of carefully selected cuts – all chosen for their strength, flexibility, and grain quality. Whether you’re crafting traditional English longbows, working on custom designs, or seeking specific pieces for detailed bow work, we supply a selection of hardwoods ideal for bow making and archery projects.
-
-
- Shop All
- Craft Woods
- Shop All
-
-
-
Craft Woods
Explore Knife & Razor Scales, Box Blanks & Veneers, Cue Blanks, Offcuts, and Stickmaking Stock – all part of our Craft Woods collection. These smaller cuts are perfect for makers seeking character-rich, manageable pieces of exotic hardwood, with options tailored for precision and decorative appeal.
-
-
- Knife & Razors
-
-
-
Knife & Razors
Explore Knife & Razor Scales, Box Blanks & Veneers, Cue Blanks, Offcuts, and Stickmaking Stock – all part of our Craft Woods collection. These smaller cuts are perfect for makers seeking character-rich, manageable pieces of exotic hardwood, with options tailored for precision and decorative appeal.
-
-
- Box Makers & Veneers
-
-
-
Box Makers & Veneers
Explore Knife & Razor Scales, Box Blanks & Veneers, Cue Blanks, Offcuts, and Stickmaking Stock – all part of our Craft Woods collection. These smaller cuts are perfect for makers seeking character-rich, manageable pieces of exotic hardwood, with options tailored for precision and decorative appeal.
-
-
- Cues
-
-
-
Cues
Explore Knife & Razor Scales, Box Blanks & Veneers, Cue Blanks, Offcuts, and Stickmaking Stock – all part of our Craft Woods collection. These smaller cuts are perfect for makers seeking character-rich, manageable pieces of exotic hardwood, with options tailored for precision and decorative appeal.
-
-
- Offcuts
-
-
-
Offcuts
Explore Knife & Razor Scales, Box Blanks & Veneers, Cue Blanks, Offcuts, and Stickmaking Stock – all part of our Craft Woods collection. These smaller cuts are perfect for makers seeking character-rich, manageable pieces of exotic hardwood, with options tailored for precision and decorative appeal.
-
-
- Stick Makers
-
-
-
Stick Makers
Explore Knife & Razor Scales, Box Blanks & Veneers, Cue Blanks, Offcuts, and Stickmaking Stock – all part of our Craft Woods collection. These smaller cuts are perfect for makers seeking character-rich, manageable pieces of exotic hardwood, with options tailored for precision and decorative appeal.
-
-
- Shop All
- Special Packs
- Shop All
-
-
-
Special Packs
Our unique Special Packs, featuring mixed selections of exotic woods tailored for craft projects and collectors alike. Perfect for trying out different species or building a one-of-a-kind collection, these packs offer an inspiring variety of textures, colours, and grains. Whether you’re a maker or a wood enthusiast, our Special Packs are a treasure trove of possibilities.
-
-
- Collectors
-
-
-
Collectors
Our unique Special Packs, featuring mixed selections of exotic woods tailored for craft projects and collectors alike. Perfect for trying out different species or building a one-of-a-kind collection, these packs offer an inspiring variety of textures, colours, and grains. Whether you’re a maker or a wood enthusiast, our Special Packs are a treasure trove of possibilities.
-
-
- Clearance
-
-
-
Clearance
Our unique Special Packs, featuring mixed selections of exotic woods tailored for craft projects and collectors alike. Perfect for trying out different species or building a one-of-a-kind collection, these packs offer an inspiring variety of textures, colours, and grains. Whether you’re a maker or a wood enthusiast, our Special Packs are a treasure trove of possibilities.
-
-
- Individual Woods
-
-
-
Individual Woods
Our unique Special Packs, featuring mixed selections of exotic woods tailored for craft projects and collectors alike. Perfect for trying out different species or building a one-of-a-kind collection, these packs offer an inspiring variety of textures, colours, and grains. Whether you’re a maker or a wood enthusiast, our Special Packs are a treasure trove of possibilities.
-
-
- Wood Specials
-
-
-
Wood Specials
Our unique Special Packs, featuring mixed selections of exotic woods tailored for craft projects and collectors alike. Perfect for trying out different species or building a one-of-a-kind collection, these packs offer an inspiring variety of textures, colours, and grains. Whether you’re a maker or a wood enthusiast, our Special Packs are a treasure trove of possibilities.
-
-
- Shop All
- Wood Guide
- Sale